
Bare walls make a room feel unfinished, but the right wall decor idea can pull everything together without a major renovation. Whether someone’s staring at a blank living room wall or trying to salvage a cramped hallway, strategic wall art turns dead space into a focal point. The trick isn’t just buying prints, it’s understanding scale, composition, and how different materials interact with light and architecture. From gallery grids to DIY fabric panels, these wall art decor ideas work across budgets and skill levels, with honest guidance on what requires professional help and what anyone can tackle over a weekend.
Key Takeaways
- Wall art decor ideas transform bare spaces into focal points by focusing on scale, composition, and material interaction with light rather than just buying prints.
- Gallery walls and salon-style arrangements solve the problem of small artwork looking lost on large walls by using strategic spacing (2–3 inches apart) and proper height placement at 57–60 inches from floor to center.
- Oversized art pieces (40×60 inches or larger) create instant drama and simplify decision-making while avoiding the layout math required for multiple works.
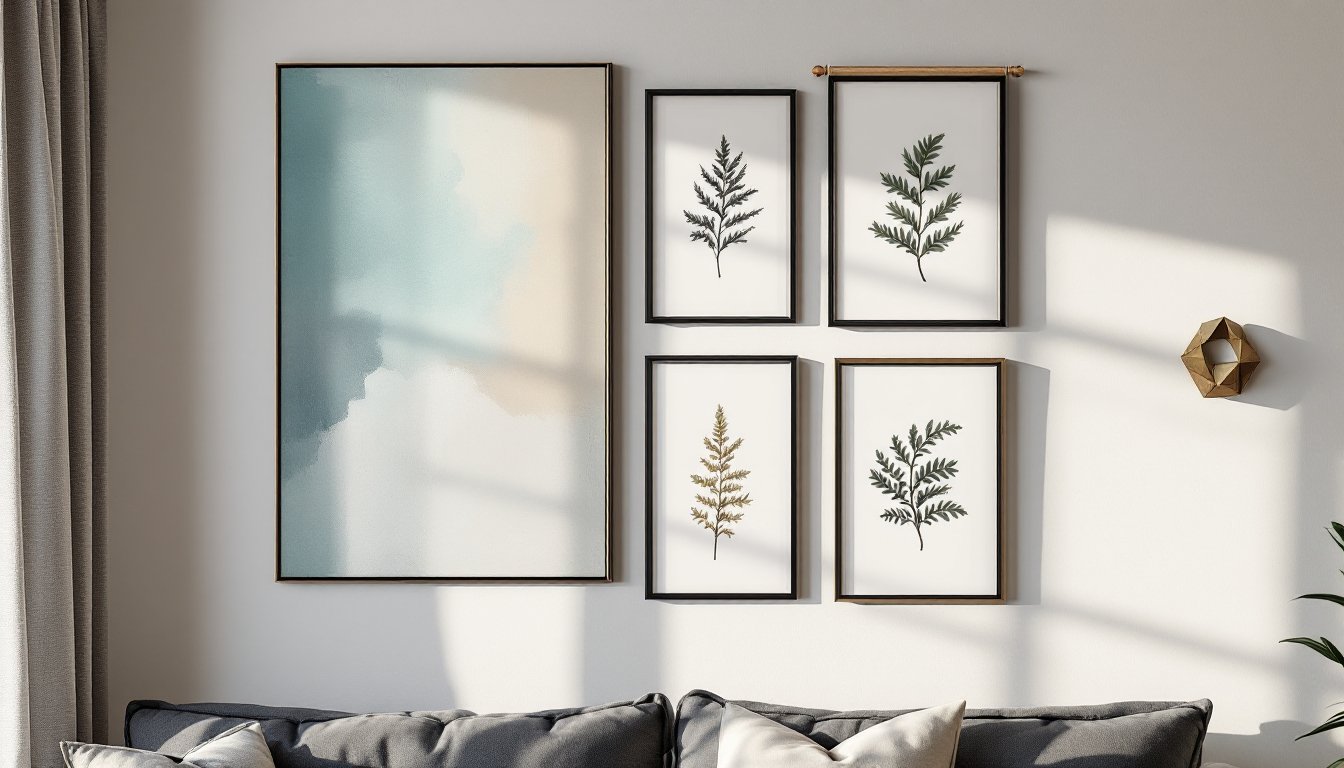
- Dimensional wall decor such as wood panels, metal sculptures, and preserved botanical elements add depth that changes throughout the day as light shifts.
- DIY wall art solutions like fabric-stretched stretcher bars and paint-chip art offer custom options for non-standard spaces without professional markups.
- Mixing art styles succeeds through color cohesion, frame consistency, and shared themes, creating a curated look rather than a random thrift-store appearance.
Gallery Wall Arrangements That Make a Statement
Gallery walls solve the common problem of small or mismatched artwork looking lost on a large expanse. The layout matters more than the individual pieces, a cohesive arrangement elevates even budget prints.
Grid layouts work best for uniform frames (same size and mat width). Measure and mark a level line for the top or bottom edge of all frames, then space them evenly, typically 2 to 3 inches apart. Use a laser level to avoid the eyeball-and-adjust spiral that leaves 20 nail holes.
Salon-style arrangements mix frame sizes and orientations but require more planning. Lay the entire collection on the floor first, arranging pieces until the overall shape forms a rough rectangle or square. The outer boundary should feel intentional, not random. Measure the perimeter, transfer those dimensions to the wall with painter’s tape, then work from the center outward. Start with the largest piece at or slightly above center, then build around it.
Hardware considerations: For drywall without studs, use two D-rings with wire on frames over 10 pounds, paired with picture-hanging hooks rated for the weight. Anchors like toggles or molly bolts handle heavier loads, check the package rating. For plaster walls, pre-drill pilot holes to prevent cracking.
Common mistake: hanging everything at the same hook height. Eye level (around 57 to 60 inches from the floor to the center of the artwork) works as a baseline, but adjust for furniture. Art above a sofa should sit 6 to 8 inches above the back cushion, not float near the ceiling.
Oversized Art Pieces for Dramatic Impact
A single large-scale piece (think 40×60 inches or bigger) creates instant drama and simplifies decision-making, no layout math, just one anchor point. This wall decor idea suits minimalist spaces or rooms where furniture already provides visual complexity.
Canvas prints are the go-to for size without weight. Stretched canvas over a wood frame keeps the piece light enough for standard drywall anchors, but check the depth, 1.5-inch depth or thicker looks more substantial than thin gallery wraps. For pieces over 30 pounds, locate studs with a stud finder and use wood screws directly into the framing (typically spaced 16 inches on center in modern construction).
Framed prints under acrylic offer a sleeker look than glass (no glare, less breakage risk) but cost more. Acrylic scratches easily during install, so leave protective film on until the piece is secured.
Fabric or tapestry panels soften acoustics in hard-surfaced rooms (useful in open-plan spaces with lots of tile or hardwood). Mount them on a curtain rod with hidden brackets, or staple the top edge to a 1×2 furring strip screwed into studs, then hide the strip with a decorative rod or trim.
Scale matters: an oversized piece on a narrow wall (less than 4 feet wide) overwhelms the space. Leave at least 6 to 12 inches of breathing room on each side. In rooms with standard 8-foot ceilings, vertical pieces can make the wall feel taller: horizontal pieces widen narrow spaces visually.
Textured and Dimensional Wall Decor
Flat prints work, but dimensional art adds depth that changes as light shifts through the day, especially valuable on walls that catch morning or afternoon sun.
Wood wall panels or slats (sometimes called accent walls) use 1×2, 1×3, or 1×4 boards in vertical, horizontal, or geometric patterns. Real dimensions: a 1×3 measures ¾×2½ inches. Attach boards to drywall with construction adhesive and finishing nails into studs where possible. Stain or paint before install to avoid gaps if the wood shrinks. Some DIYers use peel-and-stick wood veneer panels, which skip the sawdust but look cheaper up close.
Metal wall sculptures in geometric or organic shapes catch light at angles. Installation depends on weight, use heavy-duty wall anchors rated for at least double the piece’s weight if studs aren’t accessible. For renters, adhesive strips rated for the weight can work on painted drywall (test in an inconspicuous spot first: some paints peel).
Woven or macramé hangings soften industrial or modern spaces. Hang from a dowel or driftwood rod supported by L-brackets or leather straps screwed into studs. Dust collects in fiber art, so avoid them near HVAC vents or in kitchens.
Shadow boxes display three-dimensional objects (vintage tools, pressed flowers, small collections). Mount like standard frames, but verify the box’s back panel is solid, cheap shadow boxes use flimsy backing that bows under the weight of objects inside.
Nature-Inspired and Botanical Wall Art
Botanical wall art brings in organic shapes and colors without the upkeep of live plants, practical for low-light walls or rooms where watering isn’t convenient.
Pressed botanical prints (real or printed reproductions) work in simple frames with wide mats, the mat keeps focus on delicate stems and leaves. Group three to five prints in matching frames for a collected-over-time look.
Preserved moss panels or fern walls mount on wood backing and require no water or light. Real preserved greenery stays soft and vibrant for years but shouldn’t be in direct sun or high-humidity rooms (bathrooms, laundry areas). Panels typically mount with keyhole brackets on the back: screw into studs for pieces over 15 pounds.
Driftwood or branch installations add sculptural interest. Secure heavy branches with metal flanges or pipe brackets screwed into studs, they can weigh 20 pounds or more once dried. Lighter pieces can hang from picture wire looped over the branch’s natural fork.
Botanical wallpaper as framed art: Frame a 20×30-inch section of bold wallpaper (floral, leaf, or jungle prints) for the look of custom art at a fraction of the cost. Use foam board as backing to keep it taut. This wall decor idea suits renters who want impact without commitment.
Practical note: if using real preserved plants, expect some shedding over time. Avoid high-traffic areas where people brush against the wall.
Creative DIY Wall Art Solutions
DIY wall art doesn’t mean crafts-table clutter, it means custom solutions that fit odd dimensions or personal style without the markup.
Fabric panels on stretcher bars: Buy pre-made canvas stretcher bars (sold in pairs at art supply stores), assemble the frame, then stretch and staple fabric over it using a staple gun. Start at the center of each side, pull taut, then work toward corners. Upholstery fabric, vintage textiles, or even graphic bedsheets work. This approach solves the problem of finding art in non-standard sizes.
Paint-chip art: Arrange paint sample cards (free from hardware stores) in an ombre gradient inside a large frame. Glue chips to foam board or mat board with spray adhesive, then frame under glass. It’s low-cost and easily customizable by color.
Large-scale stenciled canvas: Use a foam roller and acrylic paint with a stencil for graphic patterns, stripes, chevrons, or geometric shapes. Tape off sections with painter’s tape for clean lines. A 6×4-foot canvas costs less than a comparable print and takes a few hours.
Photo ledges: Instead of nails, mount narrow picture ledges (typically 2 to 4 inches deep) to the wall with screws into studs. Lean art and photos on the ledge, swapping pieces as tastes change. Use a level and mark stud locations before drilling, ledges hold more weight when anchored properly.
Safety note: When cutting materials or sanding wood for DIY projects, wear safety glasses and a dust mask. Use a drop cloth to protect floors from paint or adhesive overspray.
Mixing Art Styles for Eclectic Appeal
Mixing art styles avoids the matchy-matchy trap but requires a unifying thread, color palette, frame style, or subject matter, so the wall doesn’t look like a thrift store exploded.
Color cohesion: Pull two or three accent colors from the room (throw pillows, rugs, furniture) and echo them across different art pieces. A black-and-white photo, a colorful abstract, and a botanical print can coexist if they share a teal accent, for example.
Frame consistency: Varied artwork in matching frames (all black, all natural wood, all brass) feels curated. Conversely, one standout ornate frame among simple ones can work as an intentional focal point, but only one.
Subject variety with common thread: Mix mediums (photography, painting, prints) but keep a loose theme, all landscapes, all faces, all geometric. This gives the eye a reason to move from piece to piece without confusion.
Scale balance: Distribute visual weight. If one side of the wall has a large, bold piece, balance it with a grouping of smaller works on the other side, not another large piece (unless the wall is very wide).
Practical tip: Before committing, use removable adhesive putty to temporarily stick lightweight prints to the wall and live with the arrangement for a day or two. What looks good in afternoon light might feel off in morning light.
Conclusion
Wall art decor ideas succeed when they fit the architecture, lifestyle, and skill level of the space. Start with one approach, gallery wall, oversized piece, or DIY solution, then refine from there. Measure twice, use the right hardware for the weight, and don’t skip the level. The walls will thank you, and so will anyone staring at them over morning coffee.