
Building an outdoor kitchen turns a basic backyard into a year-round entertainment hub. It’s more than a grill on a patio, a well-designed outdoor cooking space expands living area, increases home value, and makes hosting effortless. Unlike indoor renovations that get buried under permit delays and contractor schedules, many outdoor kitchen projects fall within DIY territory with proper planning. The key is understanding which elements handle weather exposure, how to run utilities safely, and where code requirements kick in. Whether working with a compact patio or sprawling deck, the right combination of appliances, materials, and layout creates a functional cooking zone that withstands sun, rain, and heavy use.
Key Takeaways
- Outdoor kitchen design delivers measurable returns, with projects recouping 60-75% of investment at resale while reducing indoor cooling costs and simplifying meal prep.
- A functional outdoor kitchen requires five essential components: a cooking surface, prep space with at least 24 linear inches adjacent to the grill, storage, refrigeration, and a sink with water access below frost line.
- Material selection is critical for longevity—choose granite or concrete countertops, marine-grade polymer or stainless steel cabinetry, and non-combustible backsplashes to withstand UV exposure, temperature swings, and moisture.
- Layout options including straight-line, L-shaped, and island configurations each suit different patio sizes, with islands requiring minimum 4×8 feet footprint and proper structural support for functionality.
- Budget ranges from $3,000–$8,000 for DIY-friendly modular kits to $20,000–$50,000+ for high-end outdoor kitchen designs with multiple cooking zones and premium amenities.
- Licensed professionals must handle gas line connections and electrical work per NEC standards, while DIY homeowners can save 40-60% on labor by managing framing, countertop installation, and finish work.
Why Outdoor Kitchens Are the Ultimate Backyard Upgrade
Outdoor kitchens deliver measurable returns beyond aesthetics. Real estate professionals consistently cite them as high-value amenities, Remodeling Magazine’s 2025 Cost vs. Value Report notes outdoor spaces with cooking capabilities recoup 60-75% of investment at resale, depending on regional climate and market.
The functional benefits stack up quickly. Keeping heat and cooking odors outside during summer months reduces indoor cooling costs. Prep and cleanup stay contained to one zone, eliminating the indoor-outdoor shuffle that wears out flooring and carpets. For households that grill frequently, consolidating refrigeration, storage, and counter space outdoors cuts trip time by half.
From a building standpoint, most outdoor kitchen projects don’t require the permits that indoor remodels demand, unless they involve gas line extensions, permanent roofing structures, or electrical circuits exceeding basic outlet additions. Always check local jurisdiction requirements before breaking ground. Covered structures over 120 square feet typically need permits: standalone islands often don’t.
Weather tolerance varies by region. Coastal areas require stainless steel with marine-grade ratings (316 vs. standard 304) to resist salt corrosion. Northern climates need weatherproof covers and winterization plans for plumbing. Southwestern builds benefit from shade structures and UV-resistant finishes.
Essential Elements Every Outdoor Kitchen Needs
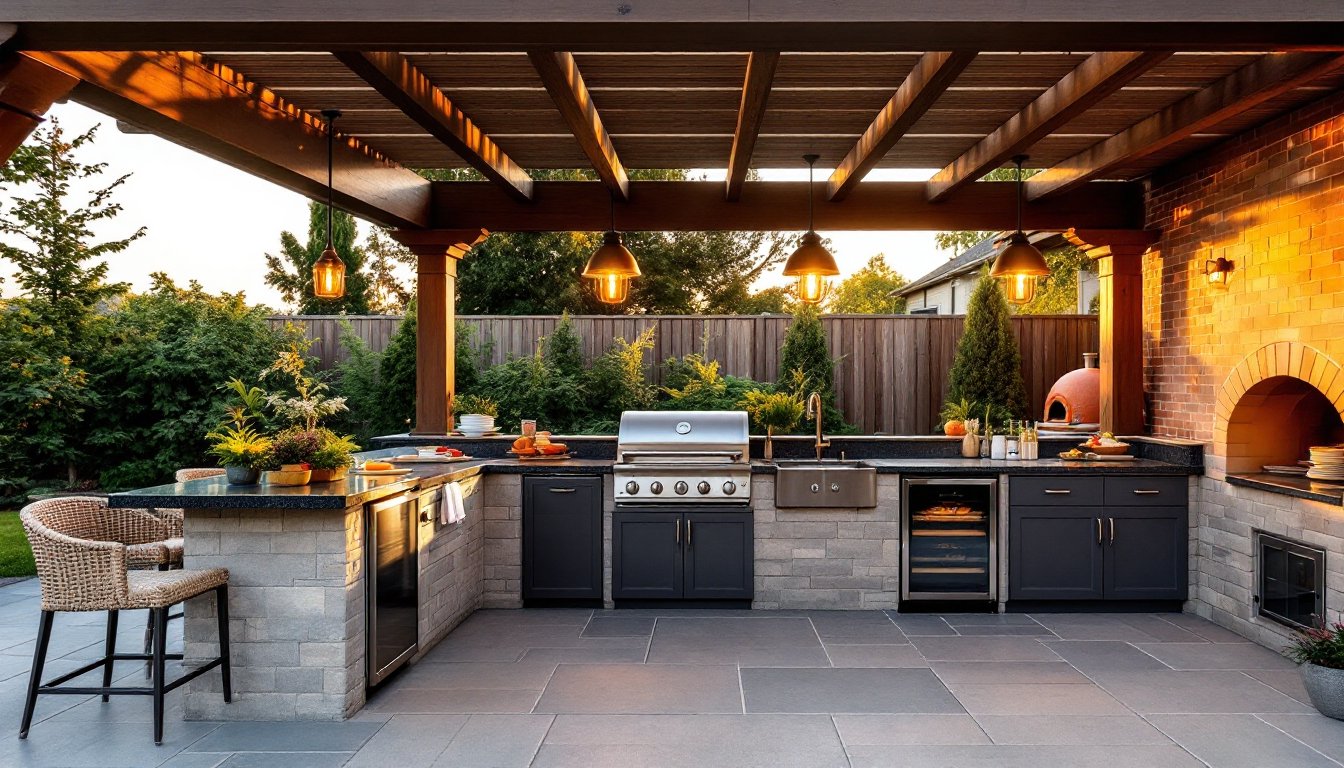
Every functional outdoor kitchen requires five core components: a cooking surface, prep space, storage, refrigeration, and a sink with water access. Skipping any creates workflow bottlenecks that turn simple meals into logistical puzzles.
Counter space should total at least 24 linear inches adjacent to the grill for plating and prep. Standard countertop depth runs 24-30 inches, same as indoor kitchens. Plan for landing zones on both sides of the cooktop.
Storage needs vary, but two base cabinets (36 inches wide minimum) handle utensils, propane tanks, and serving dishes. Marine-grade polymer cabinets outlast wood in wet climates. Stainless steel works universally but shows fingerprints and requires routine cleaning.
A sink eliminates indoor trips for washing vegetables or hands. Minimum size: 15×15 inches, single bowl. Running a water line requires trenching below frost line depth (varies by zone, 6 inches in the South, 48+ inches in northern states). PEX tubing works well for buried runs: rigid PVC cracks under freeze-thaw cycles unless properly insulated.
Refrigeration keeps proteins and beverages at safe temps. Outdoor-rated units handle humidity and temperature swings that destroy standard indoor fridges. Look for models with forced-air ventilation and sealed compressor housings.
Cooking Appliances and Equipment
The grill anchors most layouts, but choosing the right type matters. Built-in gas grills offer precise temperature control and run off natural gas (requires licensed plumber for connection) or propane. BTU output matters less than burner design, 40,000 BTUs with quality stainless burners outperforms 60,000 BTUs on cheap cast iron.
Charcoal or wood-fired options deliver flavor gas can’t match but demand more hands-on management. Kamado-style ceramic cookers (Big Green Egg, Kamado Joe) hold steady temps for smoking and high-heat searing. They’re heavy, 300+ pounds, so factor that into island structure planning.
Side burners (typically 15,000-20,000 BTUs) handle sauces and sides. Double-check clearance requirements: most codes require 12 inches minimum between burner edges and combustible surfaces.
Pizza ovens have surged in popularity. Wood-fired models need proper ventilation and non-combustible bases. Gas and pellet versions simplify operation but lose some traditional flavor. Budget $800-$3,500 depending on size and fuel type.
Add a griddle or flat-top for breakfast cookouts. Standalone units work fine, but built-in models integrate cleaner into island designs.
Layout and Design Styles for Outdoor Kitchens
Three layout archetypes dominate outdoor kitchen design: the straight line, L-shape, and island.
Straight-line layouts suit narrow patios or side yards. Appliances and counter space line up along one wall or fence. This setup minimizes plumbing and electrical runs but offers limited prep area. Best for compact lots or secondary cooking zones.
L-shaped designs maximize corner space and create natural workflow triangles. Position the grill on one leg, sink and prep on the other. This configuration works well on standard 12×12-foot patios and allows the cook to face guests.
Islands deliver the most counter space and flexibility but require access to utilities from below or trenched lines. Minimum footprint: 4×8 feet for functional workflow. Islands need structural support, typically a poured concrete slab or reinforced deck framing rated for 75+ pounds per square foot live load.
Workflow follows the same logic as indoor kitchens: arrange stations in a logical sequence, refrigerator to prep area to grill to plating counter. Keep the “triangle” between these zones compact (4-6 feet per leg) to reduce steps.
Bar seating adds social function. Standard counter overhang: 12-15 inches, supported by brackets rated for 50 pounds per linear foot. Bar height (42 inches) works better for standing conversations: counter height (36 inches) suits sit-down meals.
Choosing the Right Materials for Durability and Style
Material selection determines longevity and maintenance load. Outdoor kitchens face UV exposure, temperature swings, moisture, and freeze-thaw cycles, factors that destroy interior-grade products.
Countertops: Granite and concrete lead in durability. Granite resists stains and heat but needs annual sealing. Poured or cast concrete offers custom shapes and integrated sinks: seal it every 2-3 years with penetrating sealers like siloxane or silane. Tile works but grout lines trap moisture and stain, use epoxy grout and seal annually. Avoid laminate and butcher block: both degrade quickly outdoors.
Cabinetry: Marine-grade polymer (Trex, Duralife, Weatherstrong) handles moisture without swelling or warping. Stainless steel (18-gauge or thicker) lasts decades but dents easily and shows water spots. Avoid wood unless using marine-grade teak with proper sealing, even treated lumber rots in damp climates.
Framing and structure: Concrete block or poured concrete provides permanent, fireproof framing. Steel studs work for covered areas but need galvanized or stainless fasteners. Pressure-treated lumber (minimum 0.40 retention) serves as budget framing for cabinet bases, use ground-contact-rated (0.60) for anything touching soil. Add a moisture barrier between framing and finished surfaces.
Backsplashes and siding: Stacked stone veneer and porcelain tile resist weather and heat. Keep combustible siding at least 12 inches from grill edges or install a non-combustible heat shield (cement board, steel panel).
Smart Features and Modern Amenities to Consider
Modern outdoor kitchens integrate technology and convenience features that rival indoor setups.
Lighting: Install task lighting above prep areas (minimum 50 foot-candles) and ambient lighting for dining zones. LED strip lights under counters and inside cabinets add visibility without heat buildup. Use wet-location-rated fixtures (UL 1598 or IP65+). Run electrical on dedicated GFCI-protected circuits per NEC 210.8.
Heating elements: Infrared patio heaters extend season use in cooler months. Natural gas models (40,000 BTUs) heat 12-15 foot radius zones. Electric radiant heaters work for covered areas with nearby outlets.
Outdoor-rated outlets: Install at least two GFCI-protected 20-amp circuits, one for appliances, one for accessories. Weather-resistant boxes with in-use covers meet code for wet locations. Run Romex through conduit when surface-mounted: bury UF-B cable at code depth (12-24 inches depending on voltage and protection).
Smart controls: Wi-Fi-enabled grills and thermometers (Traeger, Weber Connect) monitor temps remotely. Automated lighting and music systems integrate through hubs like Control4 or Savant.
Fire features: Built-in fire pits or fireplaces add warmth and ambiance. Propane or natural gas models simplify operation. Maintain 10-foot clearance from structures: check local fire codes for setback requirements.
Outdoor speakers: Weather-resistant models (Polk, Klipsch, Sonos) handle moisture. Hardwire for reliability or use Bluetooth for flexibility.
Budget Planning and Cost Considerations
Outdoor kitchen costs range wildly based on scope, materials, and DIY vs. contractor labor.
Budget tier ($3,000-$8,000): Freestanding grill island kit with basic storage, no plumbing or electrical. DIY-friendly modular systems (Cal Flame, Sunstone) include framework and panels. Add a standalone mini-fridge and portable sink for function.
Mid-range ($8,000-$20,000): Custom-built island with built-in grill, side burner, sink, and refrigerator. Includes utility hookups (gas, water, electric). Granite or concrete counters, stainless or polymer cabinets. Hire a plumber and electrician: DIYers can handle framing and finish work.
High-end ($20,000-$50,000+): Expansive layouts with multiple cooking zones, pizza ovens, premium appliances, stone veneer, full lighting packages, and integrated seating. Requires design professionals and licensed trades.
Cost drivers: Plumbing and gas line runs add $800-$2,500 depending on distance from house. Electrical circuits run $400-$1,200 per circuit. Appliances range from $500 (basic built-in grill) to $6,000+ (high-BTU dual-fuel ranges). Countertops cost $40-$150 per square foot installed.
DIY savings: Handling framing, countertop installation, and finish work cuts labor costs by 40-60%. Always hire licensed pros for gas line connections (code requirement in most jurisdictions) and electrical if unfamiliar with NEC standards.
Permitting fees: Typically $50-$300 depending on project scope. Skipping permits risks failed inspections during home sales and liability issues if structures fail.