
Farmhouse kitchen wall decor has cemented its place as one of the most enduring design trends for good reason, it blends function, nostalgia, and warmth without demanding a gut renovation. Whether someone’s working with a dated 1980s galley kitchen or a new build with shaker cabinets, the right wall treatments and decor elements can pull together a cohesive, lived-in aesthetic. The beauty of this style lies in its flexibility: vintage finds mix with modern reproductions, reclaimed materials sit alongside fresh paint, and every piece can tell a story. From modern farmhouse kitchen wall decor featuring clean lines and neutral palettes to vintage farmhouse kitchen wall decor packed with patina and character, this guide walks through practical, installation-ready ideas that work in real kitchens.
Key Takeaways
- Farmhouse kitchen wall decor blends function, nostalgia, and warmth without requiring a full kitchen renovation, making it accessible for both dated and new spaces.
- Proper wall anchoring is critical for safety: vintage metal signs, open shelves, and heavy decor require toggle bolts or molly bolts rated for 10+ pounds to prevent damage.
- Open shelving transforms everyday dishes into curated displays while serving dual function as both storage and decorative wall elements, but must be anchored to studs with 3″ wood screws for stability.
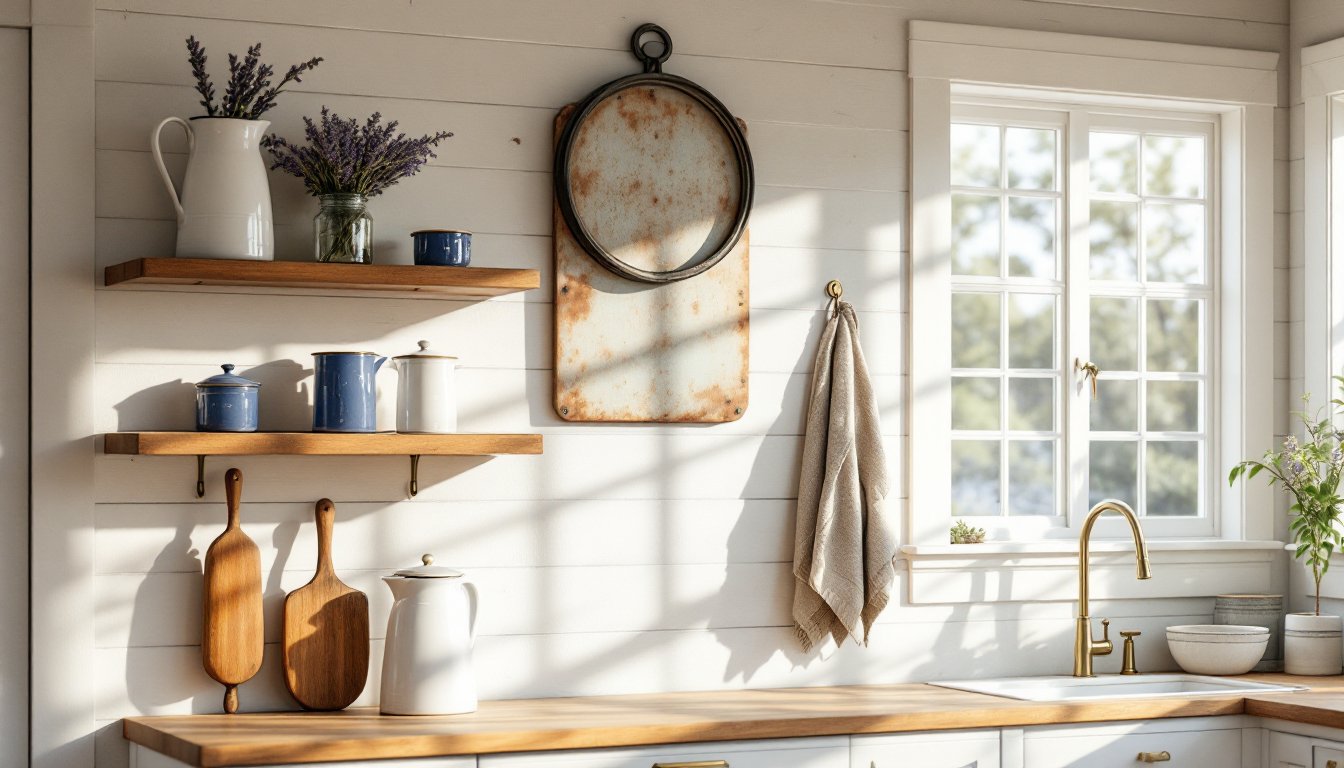
- Vintage signs, typography art, and antique kitchen tools work best when placed away from the cooktop and sink to avoid grease, heat, and moisture damage.
- Gallery walls with botanical prints and distressed frames offer flexible, renter-friendly styling; lay out the arrangement first using painter’s tape to ensure proper spacing and level placement.
- The farmhouse aesthetic rewards character and imperfection—slightly crooked pieces and mismatched frames feel intentional, so don’t overthink symmetry and build your look over time.
Why Farmhouse Wall Decor Works Perfectly in Kitchens
Kitchens are high-traffic, high-function spaces that benefit from decor that feels both intentional and unpretentious. Farmhouse aesthetics lean heavily on natural materials, muted color schemes, and objects with visible use or history, elements that disguise everyday wear better than minimalist white walls or high-gloss finishes.
Most farmhouse wall decor also carries a practical edge. Open shelving doubles as display and storage. Vintage tools aren’t just props, they’re reminders of utility. Even purely decorative elements like botanical prints or distressed wood signs introduce texture and visual breaks in spaces dominated by cabinetry and appliances.
Another reason this style endures: it’s forgiving. A slightly crooked sign or mismatched frame reads as charming rather than sloppy. For DIYers tackling their first gallery wall or testing out peel-and-stick shiplap, that margin for error matters. The farmhouse look doesn’t demand precision, it rewards character.
Vintage Signs and Typography Art
Nothing anchors a farmhouse kitchen faster than a well-placed vintage metal sign or hand-painted typography piece. Authentic enamel signs from old general stores or dairy co-ops carry weight, literally and visually, but reproduction signs in distressed finishes work just as well if the scale and placement are right.
When hanging metal signs, especially older pieces with rust or sharp edges, use wall anchors rated for the weight. A 24″ x 18″ metal sign can easily weigh 3–5 pounds: drywall anchors rated for 10+ pounds (toggle bolts or molly bolts) prevent sagging or pull-through. For brick or tile backsplash areas, use masonry anchors and a carbide-tipped bit.
Typography art, whether it’s a painted wooden board with a farm-fresh quote or a framed letterpress print, adds a softer, more modern farmhouse kitchen wall decor touch. DIYers can create custom pieces using 1×6 or 1×8 pine boards (actual dimensions: 3/4″ x 5.5″ or 7.25″), sanded smooth, primed with a stain-blocking primer, and painted with chalk or latex paint. Vinyl stencils or transfer decals make lettering straightforward, even for those without steady hands.
Place these pieces above doorways, on the wall opposite the sink, or flanking a window. Avoid hanging directly over the range, heat and grease buildup will damage painted finishes and warp wood within months.
Open Shelving as Functional Wall Decor
Open shelving has become a hallmark of farmhouse kitchens, turning everyday dishes and pantry staples into curated displays. But it’s also structural work that demands proper anchoring, not just for aesthetics, but for safety.
Most open shelves use either heavy-duty metal brackets or floating shelf hardware. Metal L-brackets (8″–12″ depth) should be screwed into wall studs with 3″ wood screws for load-bearing support. Studs typically sit 16″ on center: a stud finder is non-negotiable here. If the desired shelf placement falls between studs, use toggle bolts rated for at least 50 pounds per anchor.
Floating shelves, where the hardware is hidden inside the shelf body, require a steel rod or heavy-duty rail system mounted into studs. These aren’t suitable for drywall-only mounting, regardless of what the packaging claims. A 36″ floating shelf loaded with ceramic dishes and canisters can exceed 40 pounds.
For the farmhouse look, use reclaimed wood planks, rough-sawn pine, or poplar stained with a weathered gray or walnut finish. Sand edges lightly to avoid splinters but leave some texture visible. Seal with polyurethane or hard wax oil to protect against moisture, kitchens are humid, and unsealed wood will warp.
Style shelves with a mix of practical items (white ironstone, glass jars, cutting boards) and vintage farmhouse kitchen wall decor accents (small crocks, enamelware, wooden spools). Avoid overcrowding: negative space is part of the design.
Reclaimed Wood Accents and Shiplap Walls
Reclaimed wood and shiplap have become synonymous with farmhouse interiors, and for good reason, they add warmth, dimension, and a sense of history that flat drywall can’t match.
Shiplap refers to wooden boards with a rabbet joint that allows them to overlap slightly, creating subtle shadow lines. True shiplap is milled with this joint, but many DIYers use 1×6 pine boards with a small gap (typically 1/8″ to 3/16″) to mimic the look. Actual dimensions for 1×6: 3/4″ thick x 5.5″ wide.
Installing shiplap directly over drywall is common, but it requires hitting studs every 16″ with 2″ finish nails or brad nails. A pneumatic brad nailer speeds the job and reduces the risk of splitting boards. Apply a stain-blocking primer before installation, especially if using new pine, bleed-through from knots will show through paint.
For an accent wall behind open shelving or a breakfast nook, consider barn wood or pallet wood. Inspect reclaimed lumber carefully: remove nails, check for rot or insect damage, and plane or sand rough surfaces. Some jurisdictions require heat treatment or certification for reclaimed wood if it’s from industrial sources. Seal with a matte polyurethane or leave raw for maximum texture, though raw wood will collect grease and dust faster in a kitchen.
Shiplap and reclaimed wood are not load-bearing: they’re finish materials. Never assume they can support shelves or hooks without proper anchoring into studs or blocking behind the boards.
Antique Kitchen Tools and Utensils as Display Pieces
Vintage kitchen tools, rolling pins, wooden spoons, enamel colanders, cast-iron skillets, grain scoops, turn functional objects into sculptural wall decor. These pieces work especially well in vintage farmhouse kitchen wall decor schemes where authenticity and patina matter.
When sourcing, check estate sales, flea markets, and online marketplaces. Look for items with intact handles, minimal rust (surface rust is fine: pitting or structural rust isn’t), and interesting graphics or maker’s marks. Enamelware with chips and worn edges reads as authentic: pristine reproductions often look flat by comparison.
To hang wooden tools, use small finish nails or cup hooks driven into studs or drywall anchors. For heavier cast iron (a #8 skillet weighs 4–5 pounds), use wall anchors rated for 15+ pounds. Create arrangements by grouping similar items, three wooden spoons of varying lengths, a cluster of vintage measuring cups on hooks, or a row of enamel ladles.
Avoid hanging items over the cooktop or in high-moisture areas directly above the sink. Grease vapor and steam will damage wood and accelerate rust on metal. Instead, place collections on walls flanking windows, above doorways, or on a narrow wall between the fridge and pantry.
Clean vintage tools before display: warm water, mild dish soap, and a soft brush for wood: Bar Keeper’s Friend or a baking soda paste for enamel and metal. Dry thoroughly. For cast iron, apply a thin coat of mineral oil or seasoning oil to prevent rust, don’t use cooking oil, which can turn rancid in display pieces.
Gallery Walls with Rustic Frames and Botanical Prints
Gallery walls offer flexibility and visual interest without major installation work, ideal for renters or anyone hesitant to commit to permanent wall treatments. In farmhouse kitchens, the key is balancing frames, matting, and subject matter so the arrangement feels curated, not cluttered.
Start with a frame collection in similar finishes: distressed wood, black metal, or whitewashed pine. Mixing frame styles works, but keep the color palette tight, two to three finishes max. Thrift stores and estate sales are gold mines for vintage frames: many just need a coat of paint or a good cleaning.
Botanical prints, herbs, vegetables, vintage seed packets, or black-and-white farm photography, fit the farmhouse aesthetic naturally. For a modern farmhouse kitchen wall decor approach, use high-contrast black and white prints in matching mats and simple frames. For a more vintage look, embrace aged paper, hand-colored illustrations, and ornate frames with visible wear.
Before hammering a single nail, lay out the arrangement on the floor or use painter’s tape on the wall to mark frame positions. A level and measuring tape are essential: eyeballing leads to crooked galleries. Start with the largest or most central piece, then build outward. Maintain 2″–3″ of space between frames for visual breathing room.
Hanging hardware varies by frame weight. Lightweight frames (under 5 pounds) can use standard picture hangers nailed into drywall. Heavier frames need wall anchors or screws into studs. For a cleaner look, use D-rings and picture wire on the back of each frame rather than sawtooth hangers, which tend to slip.
Safety note: Avoid hanging glass-fronted frames directly above food prep areas or the stove. If glass breaks, it can fall into food or onto hot burners. Use acrylic glazing for those zones or opt for unframed prints on wood panels.
Conclusion
Farmhouse kitchen wall decor thrives on a mix of authenticity, practicality, and a willingness to let texture and imperfection play a role. Whether someone leans toward modern farmhouse simplicity or vintage-heavy character, the core principles remain the same: anchor pieces properly, choose materials that can handle kitchen conditions, and don’t overthink symmetry. The best farmhouse kitchens look collected over time, not designed in a single afternoon, so start with one strong element and build from there.