
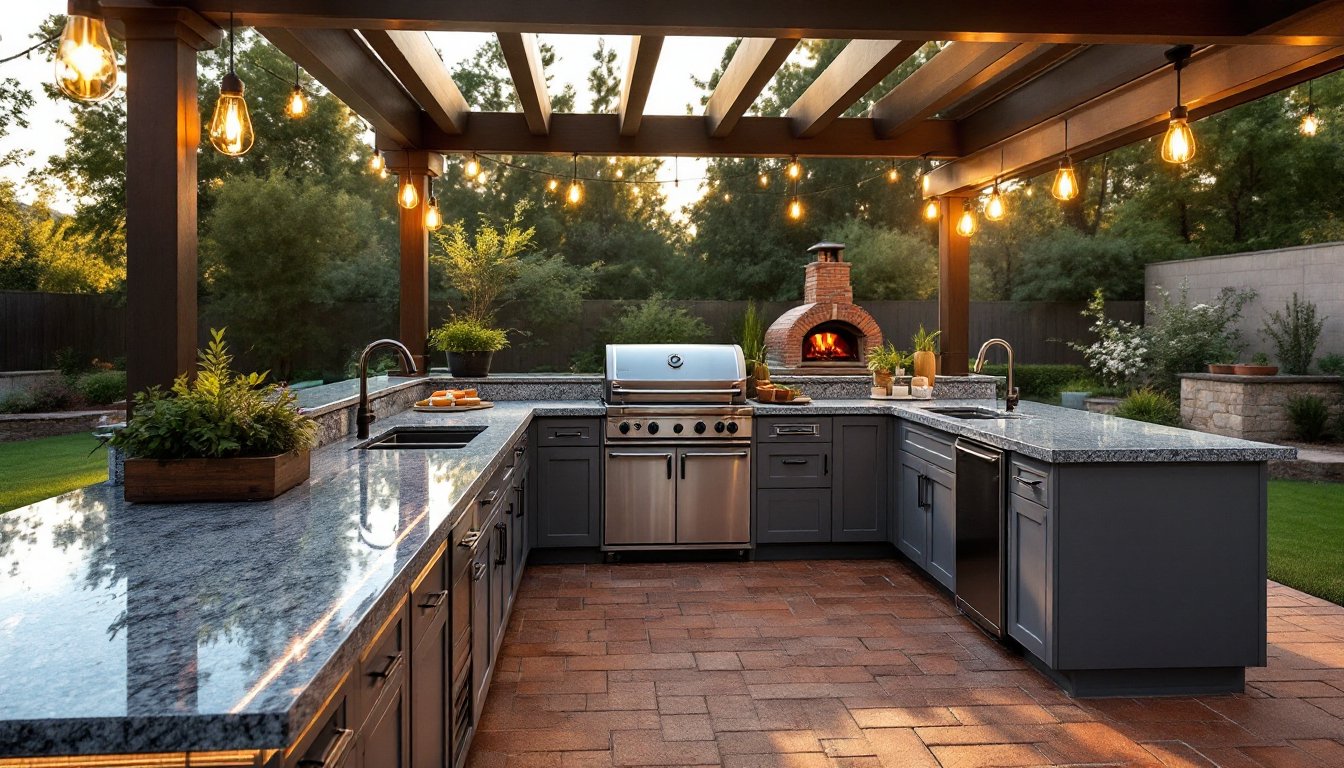

An outdoor kitchen isn’t just a grill on a patio, it’s a full cooking and entertaining zone that extends living space beyond four walls. Done right, it handles meal prep, cooking, cleanup, and guest flow without sending anyone back inside for ice or utensils. But outdoor kitchen design involves more than picking appliances. It requires planning around utilities, weather, workflow, and local building codes. This guide walks through layout, appliance selection, material choices, utility runs, and comfort features so homeowners can design a functional outdoor kitchen that performs year after year.
Key Takeaways
- Designing an outdoor kitchen requires careful planning around utilities, location, and local building codes—place the kitchen within 15–20 feet of the house to minimize expensive utility runs.
- Follow the work triangle principle (grill, prep surface, and sink) and ensure proper clearances: 6–12 inches of non-combustible material around appliances and 36–42 inches of aisle width for safe movement.
- Choose durable outdoor-rated materials like granite, concrete, or stainless steel for countertops, and stainless steel or marine-grade polymer for cabinetry to withstand UV, moisture, and temperature fluctuations.
- Gas, electric, and plumbing installations require permits and licensed professionals—use GFCI-protected outlets, properly sized gas lines with bonding, and PEX or copper water lines with shutoff valves for winterization.
- Enhance usability and enjoyment with shade structures (pergolas or roofs), layered lighting (task and ambient), and comfort features like fans, heaters, and seating that bring the outdoor kitchen to life year-round.
Planning Your Outdoor Kitchen Layout and Location
The first decision is where the kitchen sits. Proximity to the indoor kitchen matters, running utilities (gas, water, electric) gets expensive fast beyond 15–20 feet from the house. Check local setbacks and clearances: many jurisdictions require at least 10 feet from property lines for permanent structures with gas or electric service.
Evaluate sun exposure and prevailing wind. A grill facing west means cooking into afternoon glare. Wind direction affects smoke, nobody wants it blowing straight into the dining area or house windows. Flat, stable ground simplifies construction. Slopes require grading, retaining walls, or piers, all of which add cost.
Layout should follow the work triangle principle: grill (cook zone), prep surface, and sink or cooler (cleanup/beverage station). A linear layout (think galley kitchen) works for narrow spaces. L-shaped or U-shaped configurations offer more counter space and better traffic flow for entertaining.
Measure clearances around appliances. Built-in grills need 6–12 inches of non-combustible material on each side (check manufacturer specs). Allow at least 36–42 inches of aisle width behind the cook for safe movement. If adding a bar or seating, plan for 24 inches of counter overhang and 30 inches of clearance behind stools.
Essential Appliances and Features to Include
Start with the grill. Built-in gas or propane models (36–42 inches wide) suit most families and integrate cleanly. Cart grills work but look tacked-on. For serious cooks, add a side burner for sauces or side dishes, single-burner units run around 12 inches square.
A sink changes everything. It keeps raw meat prep outside, makes cleanup instant, and provides a water source for filling pots or washing produce. A simple drop-in stainless sink (15–18 inches) is enough. Pair it with a hot/cold faucet rated for outdoor use.
Refrigeration keeps ingredients and drinks cold without indoor trips. Outdoor-rated refrigerators (24-inch undercounter models are common) withstand humidity and temperature swings better than indoor units dragged outside. Alternatively, an insulated cooler drawer or kegerator works for beverages.
Consider a pizza oven if space and budget allow. Wood-fired or gas models add versatility. They require ventilation and a non-combustible base, typically a steel stand or masonry platform.
Storage is non-negotiable. Include drawers for utensils, cabinets for propane tanks (with ventilation), and a trash pullout. A paper towel holder and hooks for tools keep things tidy.
Selecting Durable Materials for Outdoor Conditions
Countertops and Surfaces
Outdoor countertops take a beating: UV, rain, freeze-thaw cycles, grease, and heat. Granite and concrete both handle heat and weather well. Granite resists stains and scratches: seal it annually in humid climates. Poured or cast concrete offers custom shapes and embedded features (drain grooves, bottle openers) but needs sealing every 1–2 years to prevent moisture intrusion.
Tile (porcelain or natural stone) works over a concrete backer but grout lines collect grime, use epoxy grout for better stain resistance. Avoid laminate and butcher block: both fail outdoors. Stainless steel is heat-proof and easy to clean but shows fingerprints and scratches.
Pick a countertop with a finished edge profile and slight overhang (1–1.5 inches) to shed water away from cabinets.
Cabinetry and Storage Solutions
Stainless steel cabinets are the gold standard, rust-resistant, rodent-proof, and low-maintenance. Look for 304-grade stainless with sealed, welded seams. Marine-grade polymer cabinets (HDPE or similar) resist UV and won’t corrode, warp, or fade. They cost less than stainless and come in multiple colors.
Avoid wood, even treated or cedar, unless it’s under a roof and well-sealed. Moisture causes swelling, rot, and finish failure. If using masonry (brick, stone, CMU block), frame out niches for doors, outdoor-rated stainless or polymer doors keep critters and rain out.
All cabinetry should have ventilation slots at the bottom if storing propane or gas appliances. It’s a code requirement in most areas and prevents dangerous gas buildup.
Utilities: Gas, Electric, and Plumbing Considerations
This is where DIY often ends and pros begin. Running utilities outdoors typically requires permits and inspections.
Gas: Natural gas or propane lines must be sized correctly and installed by a licensed plumber or gas fitter. Undersized lines cause weak flames and appliance problems. Flexible CSST (corrugated stainless steel tubing) is common for branch runs but must be bonded per NEC code to prevent lightning strikes from igniting gas. Propane tanks (20 lb or larger) need ventilated storage and clearance from ignition sources.
Electric: Outdoor receptacles must be GFCI-protected and weatherproof (in-use covers, not flat “while not in use” types). Run circuits on dedicated 20-amp breakers. Hire a licensed electrician for anything beyond a simple exterior outlet, outdoor wiring involves conduit (PVC or EMT), proper burial depth (typically 18–24 inches depending on method), and correct box ratings. Task lighting, refrigerators, and outlets can share circuits, but large appliances (rotisserie burners, heaters) often need dedicated runs.
Plumbing: Extend hot and cold water lines from the house or garage. Use PEX or copper: standard PVC is for drains only. Install shutoff valves indoors so the system can be drained before winter in freeze-prone climates. Drain lines must slope 1/4 inch per foot minimum to a sewer or septic connection. If connecting to septic, check local codes, gray water from an outdoor sink may need a separate drain field. Always use a P-trap under the sink to block sewer gases.
In cold climates, add a drain valve at the low point of each water line and blow out lines with compressed air before the first hard freeze.
Creating Comfort with Shade, Lighting, and Seating
An outdoor kitchen without shade is miserable by midday. Pergolas offer partial cover and support for climbing plants or retractable canopies. For full protection, consider a gable or shed roof with gutters. Metal roofing (standing seam or corrugated) stands up to weather and reflects heat. If building a roof structure, check whether it’s considered an accessory structure or addition, setback and permitting rules vary.
Umbrellas work for flexible shade but need heavy bases (50+ pounds) or in-ground mounts to handle wind. Retractable awnings are convenient but require solid mounting to the house or a beam.
Lighting extends usability after sunset. Combine task lighting (under-cabinet LED strips, gooseneck fixtures over the grill and prep areas) with ambient lighting (string lights, post lights, or recessed cans in a roof structure). All fixtures should be rated for wet or damp locations (check the UL label). Use warm white LEDs (2700–3000K) to avoid the harsh blue cast of daylight bulbs.
Seating depends on the layout. A bar with stools along one side creates a social hub without encroaching on the cook. Use outdoor-rated bar stools (aluminum, teak, or all-weather wicker) and plan for 10–12 inches of knee clearance under the counter. If space allows, add a separate dining table within easy serving distance. Built-in benches with storage underneath maximize tight spaces.
Comfort features like ceiling fans, outdoor heaters (propane or electric radiant), and bug control (screened walls, fans that disrupt insect flight) make the space usable across seasons. In hot climates, misting systems drop temps by several degrees but increase humidity.